Overview
Xant Playbooks allows users to send emails directly from the product using their own Exchange or SMTP email accounts. Emails are tracked and representatives are notified when their prospects engage with their emails. This guide explains how to set up these accounts to work with the tool.
Information
Xant Playbooks Support multiple email platforms. Depending on your service, the configuration instructions may vary:
- If you use Gmail you are all set, and you don't need to set up anything in the tool.
- If Microsoft Office 365 (O365) has been configured to require admin consent for 3rd Party apps, review the Setting Up Email Access for Microsoft Office 365 (O365) in Salesforce KB Article.
- If you use Exchange or SMTP, you'll be prompted to provide service account credentials. Use this article as your guide to complete.
Keep in mind, the type of email you use may have limitations to what features it has access to in Playbooks.
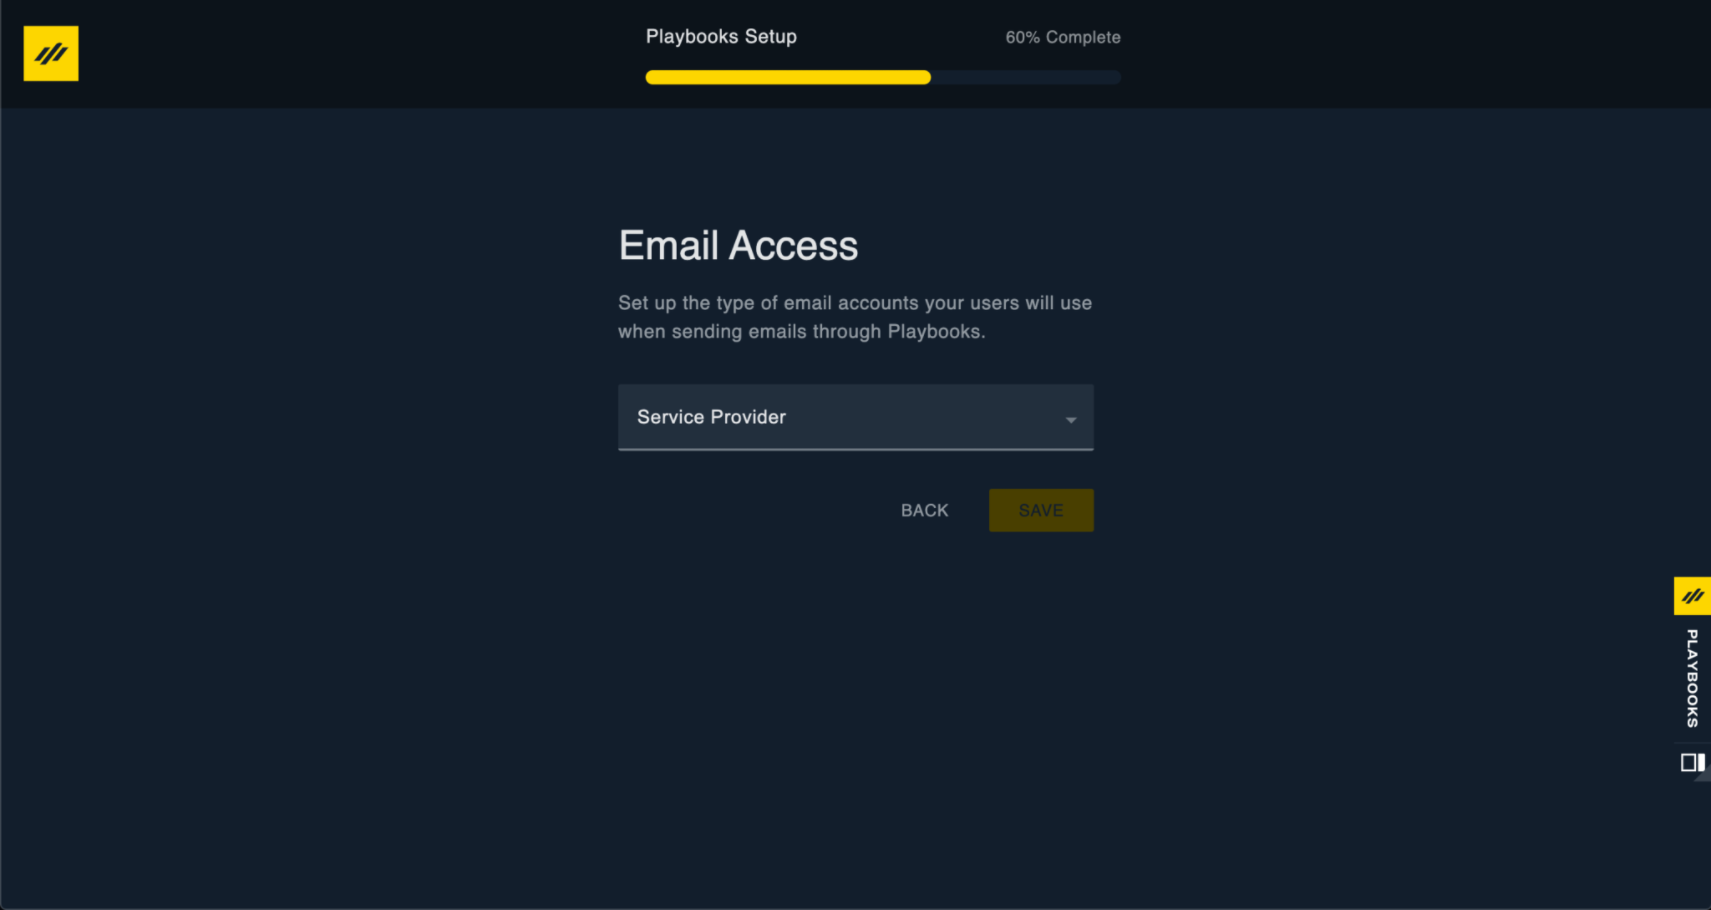
You can configure the email access by indicating what email service provider you use in the Setup Wizard. To set up the email access while using Exchange or SMTP, complete the following steps:
- Open the Playbooks Manager Application's Setup Wizard and set up the email address and password.
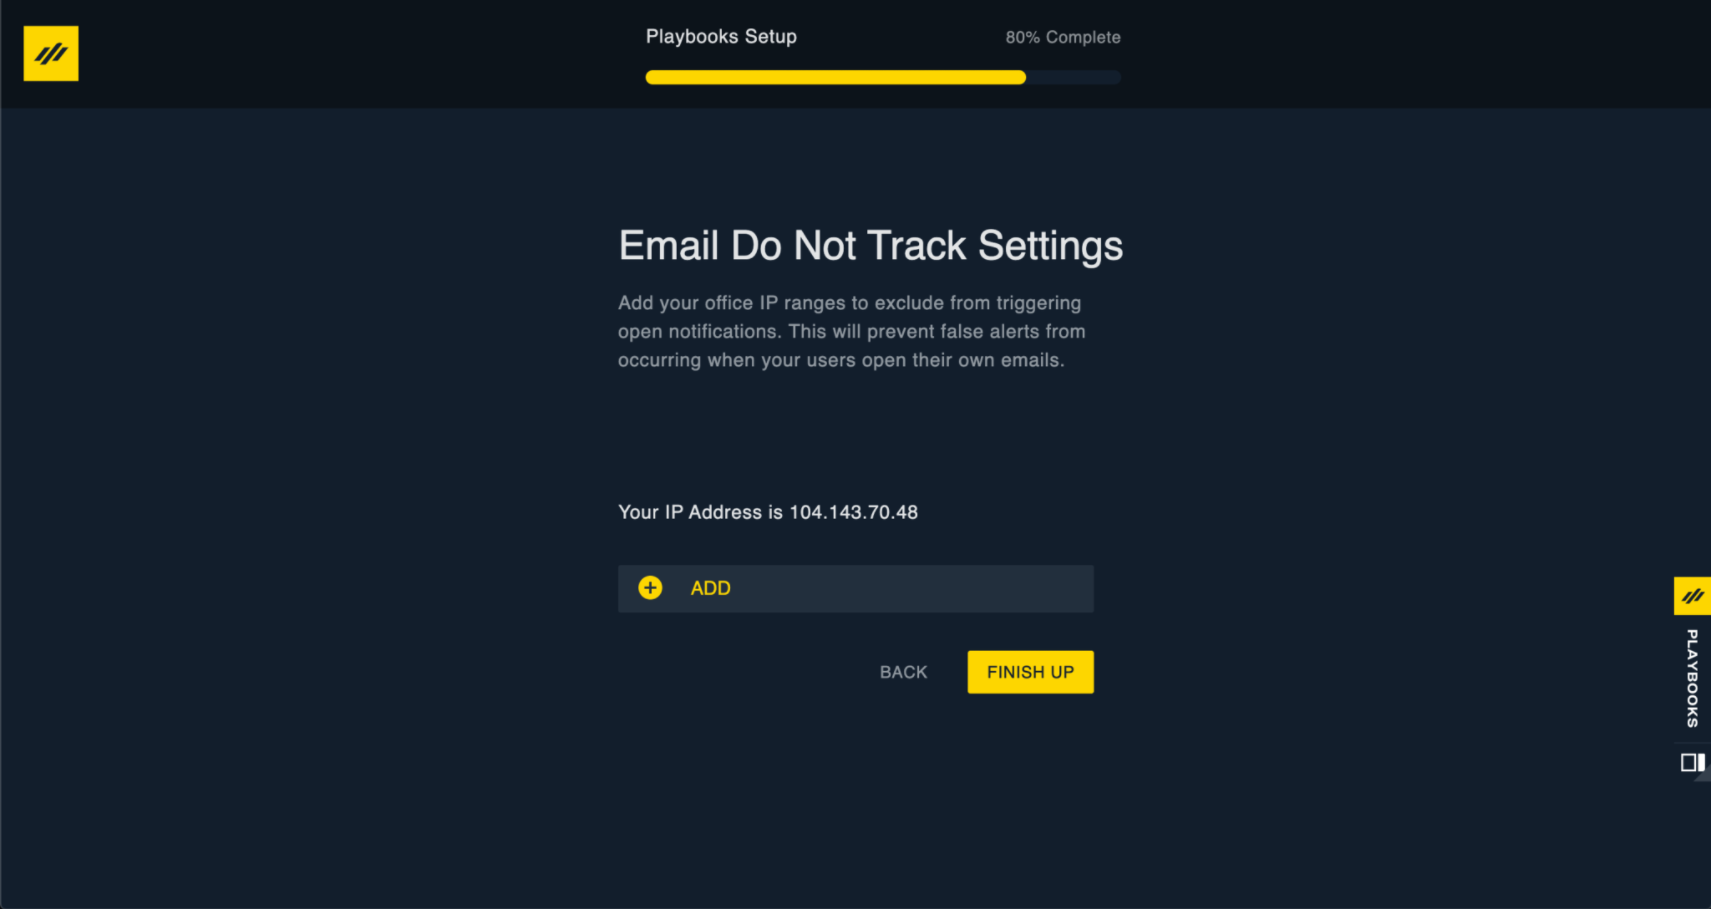
The Setup Wizard will automatically check for your current IP address and add it to the Do Not Track list. It is assuming that you are completing the Playbooks Setup & configuration from your office location. -
Click on the ADD button. By entering your office IP it will prevent false alerts from occurring when your users open their own emails.
If your users are spread out among multiple office locations, it is a good idea to track down those IP addresses and add them all to this list. You can do this while in the Setup Wizard, or later by going to the Playbooks Manager Settings tab at the top of the page, then Do Not Track at the left-side menu.
- After adding relevant IP addresses, click the Finish Up button. You will then automatically be routed to the Playbooks Manager App.
- Continue with your Playbooks account configuration using the Manager Onboarding Experience.
Priyanka Bhotika
Comments