Overview
You want to know where can the Create User information be found, to create users in Playbooks.
Information
To create a new user in your platform, you must contact Support so the user is created. When contacting support, make sure you include the following information in the request:
- First Name
- Last Name
- Username
- Permission Group (Choose between Admin, Manager or Sales Rep.)
Once it is created, you will be able to modify the new user information in the Playbooks Manager Application.
Notes: If you want a user to have 2 accounts in Playbooks simultaneously, the user need to have 2 different accounts in CRM as well (for synchronization to work properly).
If you log into Salesforce in one tab and access the Playbooks Manager Application in another tab, you can use the Salesforce button to log in to the Manager app.
Bear in mind that the new user is not part of a team, so you must add this new user to a team with the corresponding permissions. You will find more information about this process in the Adding Users to Playbooks and Assigning them to Teams KB Article.
<supportagent>
AGENTS ONLY
To create a new user, complete the following steps:
- Open the Provision UI tool and log with your credentials.
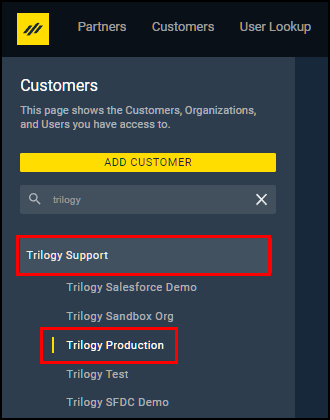
- Look for the customer in the CUSTOMERS tab and select the proper organization.
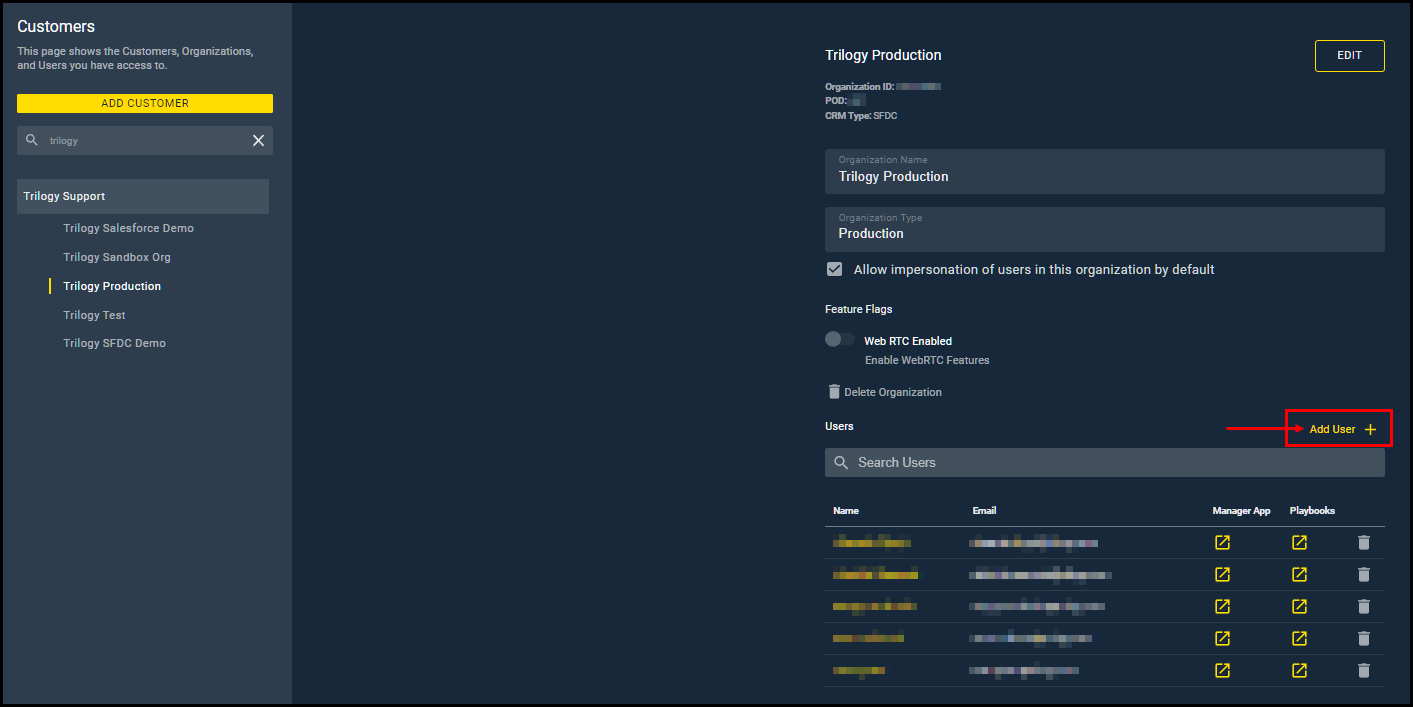
- Click on the yellow link Add User +.
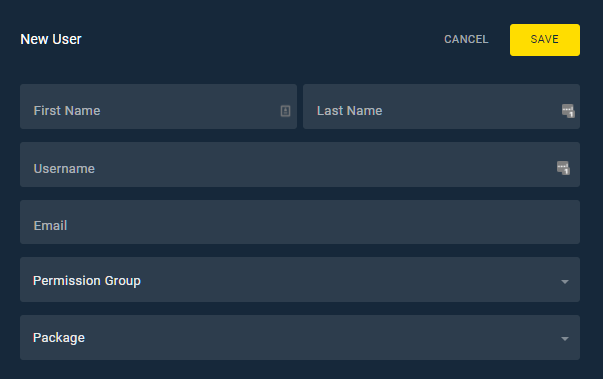
- Fill the blanks in the new Form, with the information provided by the customer.
When you click in the last field (Package) you will see a dropdown menu with the license type this customer has bought. You must select the package from the menu, and one license will be subtracted from the Licensing package.
- Click the SAVE button and the new user will be saved in Playbooks records.
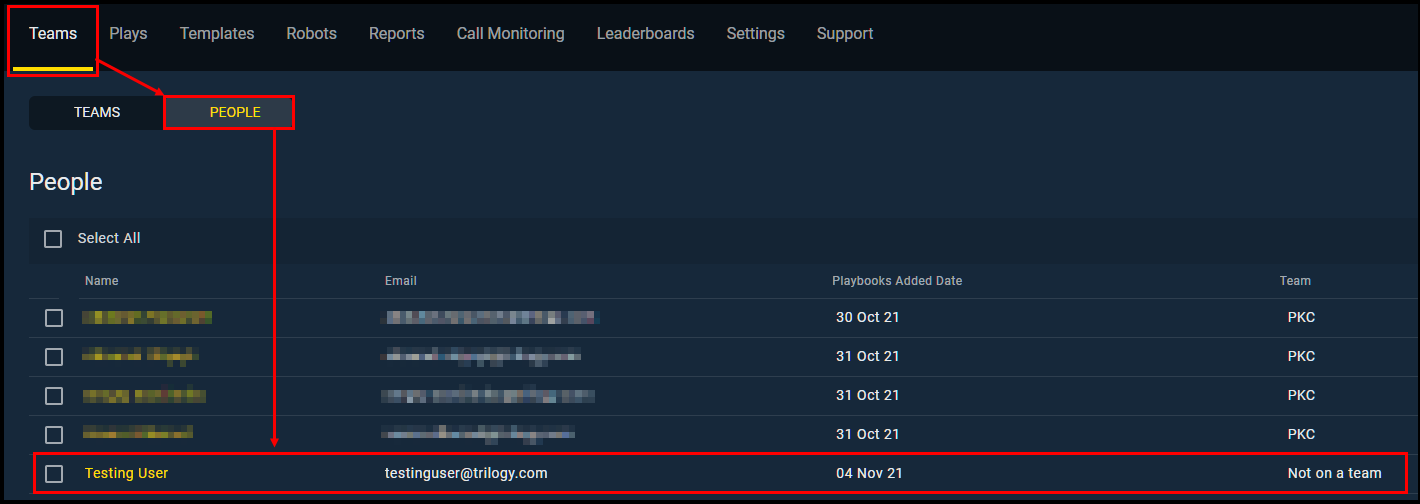
- Tell the customer to open the Playbooks Manager app and go to Teams > PEOPLE menu.
The customer will now be able to see the information related to the new user.
</supportagent>


Priyanka Bhotika
Comments